When your cooling system breaks down during a scorching summer in Indianapolis, an emergency repair is not just a convenience—it’s a necessity. Cooling systems emergency repair in Indianapolis, IN, can be a stressful situation, but knowing what to expect from your technician can help ease the process. From the initial assessment to post-repair follow-up, understanding each step will prepare you for a smooth and efficient service experience.
Initial Assessment Process: Evaluating the System Issues
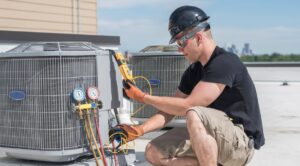
The first thing your technician will do upon arrival is conduct a thorough initial assessment of your cooling system. This step is crucial as it helps identify the specific problems that need to be addressed.
The technician will typically start by asking you questions about any recent issues or changes in the system’s performance. Have you noticed unusual noises, weak airflow, or uneven cooling? Such details provide valuable insights that guide the technician’s assessment.
After gathering information, the technician will visually inspect the system. This includes checking the thermostat settings, air filters, and visible components of the HVAC unit. Any signs of wear, damage, or leaks will be noted. In some cases, they might also inspect the electrical connections to ensure there are no shorts or faulty wiring that could be causing the problem.
With the initial assessment complete, your technician will move on to a more in-depth diagnosis, using advanced tools and techniques to uncover the exact issue.
Diagnostic Techniques Used: Tools and Methods Explained
Once the initial assessment is complete, the technician will move on to more detailed diagnostic techniques to pinpoint the exact cause of the malfunction. Various tools and methods are employed to ensure a comprehensive diagnosis.
One of the most common tools used is a multimeter, which measures the voltage, current, and resistance within the system. This tool helps identify electrical issues, such as a blown fuse or a malfunctioning capacitor. The technician may also use a refrigerant gauge to check the pressure levels within the system. Low refrigerant levels often indicate a leak, which can significantly reduce the cooling efficiency.
Thermal imaging cameras are sometimes used to detect heat signatures and identify areas where the system is losing efficiency. These cameras can reveal hidden issues such as duct leaks or insulation problems. Additionally, airflow meters may be employed to measure the amount of air passing through the system, ensuring that there are no blockages or issues with the blower fan.
By using these diagnostic tools, the technician can accurately determine the root cause of the problem, which is essential for implementing the correct repair procedure.
After diagnosing the issue, your technician is ready to begin the repair process, tackling the problem step by step to restore your cooling system to full functionality.
Repair Procedure Overview: Steps in Emergency Repair
With a clear diagnosis in hand, the technician will begin the emergency repair process. This procedure generally involves several key steps, depending on the nature of the issue.
-
System Shut Down: The technician will first power down the system to ensure safety. This step is vital to prevent electrical shocks or further damage to the unit during repairs.
-
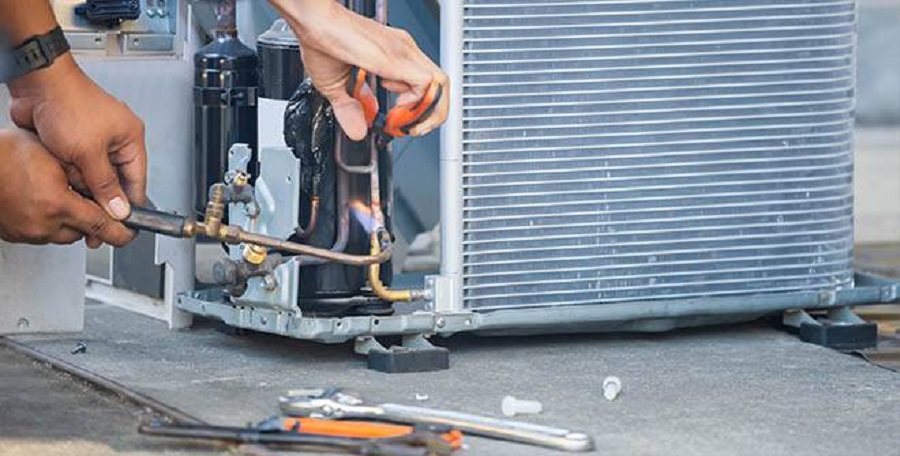
Component Replacement or Repair: If the diagnosis reveals that a component needs to be replaced, such as a faulty compressor, capacitor, or fan motor, the technician will remove the damaged part and install a new one. In cases where the component can be repaired, such as fixing a refrigerant leak, the technician will perform the necessary repairs on-site.
-
Cleaning and Maintenance: Often, cooling system issues are exacerbated by dirt and debris buildup. The technician might clean the coils, replace the air filters, and clear any blockages in the ductwork to restore optimal performance.
-
Refrigerant Recharging: If the system was low on refrigerant due to a leak, the technician would recharge the system after repairing the leak. This step is crucial for restoring the system’s cooling capacity.
-
System Testing: After repairs are completed, the technician will power the system back on and perform a series of tests to ensure everything is functioning correctly. This includes checking the thermostat, monitoring the airflow, and verifying that the system is cooling the space evenly.
Understanding the repair process can help you gauge how long the work might take, which brings us to the next point—timing and service duration.
Timeframe and Service Duration: How Long Repairs Take
The duration of an emergency cooling system repair can vary depending on the complexity of the issue. However, most repairs are completed within a few hours on the same day.
For minor issues like replacing a capacitor or fixing a small leak, the repair might take just one to two hours. More complex repairs, such as replacing a compressor or fixing extensive ductwork issues, could take several hours or even require a return visit if parts need to be ordered.
Your technician will provide an estimated timeframe after the initial assessment, so you know what to expect. Emergency repairs are typically prioritized, meaning the technician will work efficiently to restore your cooling system as quickly as possible.
Once the repair is complete, there are still important steps to take to ensure your system remains in top condition.
Post-Repair Follow-Up Steps: What Happens After Repairs
Once the emergency repair is completed, the technician will not simply pack up and leave. A series of post-repair follow-up steps are taken to ensure your system operates smoothly and to prevent future issues.
-
System Monitoring: The technician will likely monitor the system for a short period to ensure that it is functioning correctly and that the repairs have fully resolved the issue. This includes checking the temperature output, airflow, and overall system performance.
-
Customer Education: To help you avoid future emergencies, the technician may provide tips on proper maintenance and operation of your cooling system. This could include advice on how often to replace filters, how to set your thermostat for optimal performance, and when to schedule regular maintenance.
-
Maintenance Scheduling: To keep your system running efficiently, the technician might recommend setting up a routine maintenance schedule. Regular check-ups can help catch potential problems early before they turn into costly emergency repairs.
-
Follow-Up Contact: In some cases, the repair service may follow up with you after a few days to ensure your system is still operating properly and that you are satisfied with the repair. This is a good time to report any lingering issues or concerns.
Knowing the follow-up steps can give you peace of mind, ensuring that your cooling system will continue to function well long after the emergency repair is done.
Peace of Mind with Professional Service
Emergencies with your cooling system can be nerve-wracking, but understanding the repair process can alleviate some of that stress. Knowing what to expect from your technician—from the initial assessment to the final follow-up—ensures you are prepared for each step. This preparation helps ensure a quick, efficient repair, getting your system back to cooling your home as it should.